After having seen many versions on Internet, I have just created my own theremin using Arduino! Nothing too much fancy, just a couple of sensors and a VST on software side, and that’s it. Here are the details…
Hardware
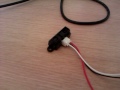
From a hardware point of view, the circuit is quite simple: I am using two IR proximity sensors, connected to two analog input pins of the Arduino Uno, plus a couple of leds, which increase their light in proportion to the readings from the sensors, and a couple of pushbuttons, useful for blocking the values sent to the computer (regardless of the readings).
I have also changed the Arduino firmware, as indicated here, using this one, so that the Arduino itself is seen from the computer as a MIDI device, instead of a USB-to-serial port; this has been easy enough: just a 10K resistor is required, soldered in the position indicated on the guide, and then a couple of commands and the new firmware is up and running. Of course, you will need to change it with the standard one quite often in the beginning, before settling the final version of the sketch (which can be uploaded only with the USB-to-serial code). Note that this operation can be done only on an Arduino Uno.
As you can see, the device is correctly shown in QJackCtl:

QJackCtl Alsa view
Software

On the software side: first of all I have searched for an existing program which could reproduce the Theremin sound: there are a few, one very interesting is written in Python but it works only with OSS, and the Alsa emulation does not work at all (Ubuntu does not support OSS since a couple of years); there is also a CSound library, but it did not sound that well. In the end, I have decided to use this free VST effect, which is not free software (unfortunately), but has many different options and it also shows a MIDI input, so it can be driven using MIDI CC #60 and #61 (for x and y directions).

Super Spook Keys
The Arduino program is very simple: it reads values from both the sensors, collecting five consecutive values; after that, it computes the mean of the values (for smoothing the signal) and sends it through the serial line as MIDI messages, then it repeats. The two leds are set a value proportional to the sensors, and if one of the two buttons is pressed, the corresponding sensor is blocked to the last valid value, so that (for example) the volume can be blocked while the pitch is changed, or viceversa.
Conclusions

Recording session
Quite fun, again: I have also added all the components to a prototipying shield, so that as soon as a new enclosure arrives, I will be able to move everything together and close up my third Arduino circuit of the summer; you can briefly see part of that shield in the first video, although it is not in use yet.
Let me know if you want any detail…
P.S.
Webcam recording on Linux (or, at least, on Ubuntu 11.04) sucks: mencoder exited with floating point exception ( :-O ), ffmpeg just crashed, the same for Cheese; in the end, GStreamer saved me (and allowed me to easily record the second video), with the definitive pipeline:
gst-launch-0.10 v4l2src device=/dev/video1 !
 'video/x-raw-yuv,width=640,height=480,framerate=30/1' !
 tee name=t_vid ! queue ! xvimagesink sync=false t_vid. !
 queue ! videorate ! 'video/x-raw-yuv,framerate=30/1' !
 queue ! mux. alsasrc device=hw:0,0 !
 audio/x-raw-int,rate=48000,channels=2,depth=16 ! queue !
 audioconvert ! queue ! mux. avimux name=mux !
 filesink location=webcam.avi


![]()